How to Thread a Sewing Machine: Step-by-Step Guide
To thread a sewing machine, you raise the take-up lever, run the top thread through the guides and tension discs down to the needle, then wind and insert a bobbin and draw the bobbin thread up through the needle plate. Get the order wrong and the machine will skip stitches or jam so the sequence matters more than speed.
If you’ve picked up sewing for the first time, or dusted off an old machine that’s been sitting in the cupboard, threading is usually the first hurdle. It looks fiddly, but it’s really just two short sequences done in the right order: threading the top (needle thread) and loading the bottom (bobbin thread). Once you’ve done it a few times, it takes under a minute.
Affiliate Disclosure: This post contains affiliate links. If you buy through them, HomeNoche may earn a small commission at no extra cost to you. Full details on our Affiliate Disclosure page.
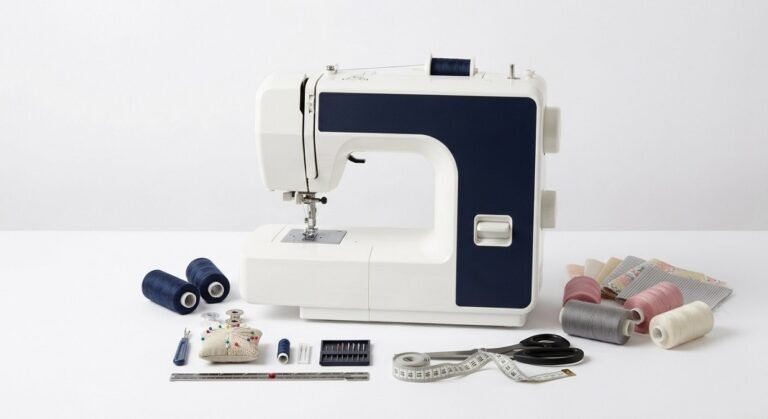
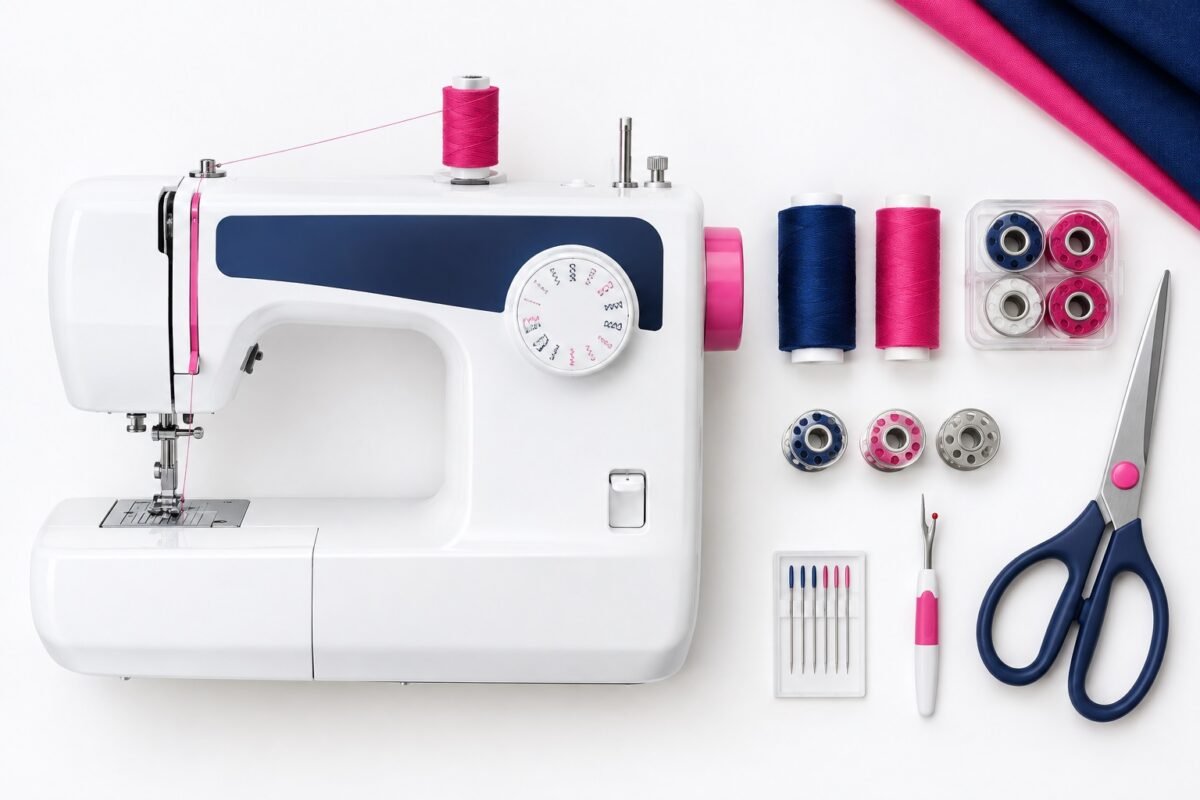
What You’ll Need
- Your sewing machine, powered off during threading
- A spool of thread (all-purpose polyester thread suits most home sewing)
- An empty or pre-wound bobbin
- Small scissors or a thread snipper
- Good lighting threading is fiddly enough without squinting
Threading the Top of the Machine (Needle Thread)
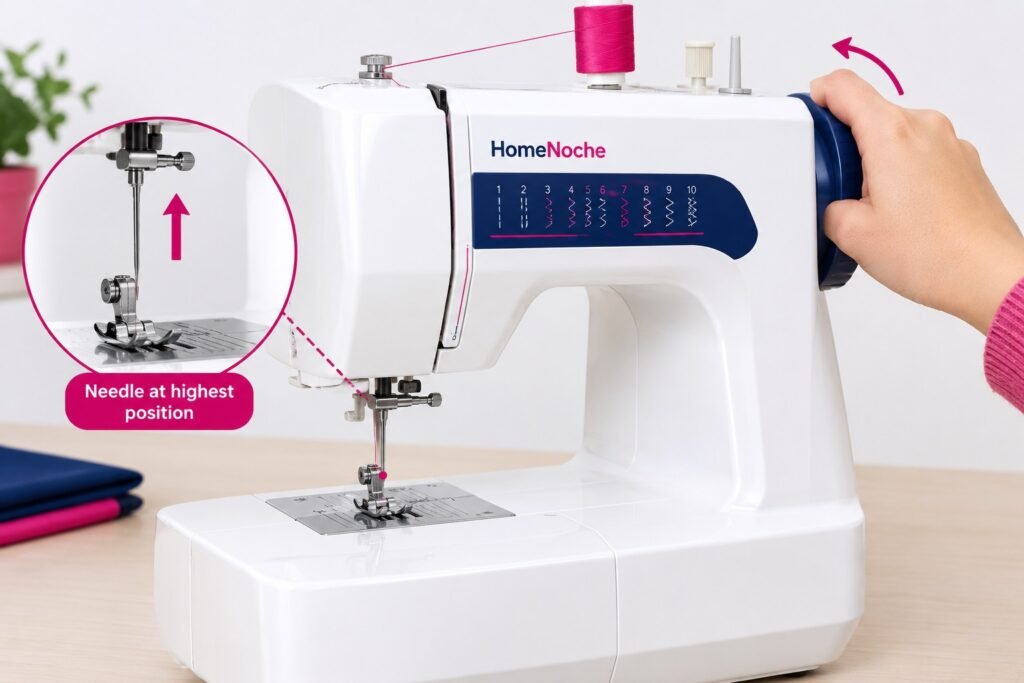
Raise the needle and take-up lever to their highest point, then guide the thread through the spool pin, tension discs, take-up lever, guides and finally the needle, from front to back.
- Raise the needle to its highest position. Turn the handwheel toward you until the needle and take-up lever are both at the top. This opens the tension discs so thread can slide in properly.
2. Place the spool on the spool pin. Most machines have a small cap or notch to stop the spool spinning loose use it if fitted.
3. Guide the thread through the first thread guide, usually a small hook or wire loop near the top of the machine.
4. Draw the thread down and between the tension discs. This is the step most beginners rush if the thread doesn’t sit fully between the discs, your tension will be wrong and stitches will look loose or loopy on one side.
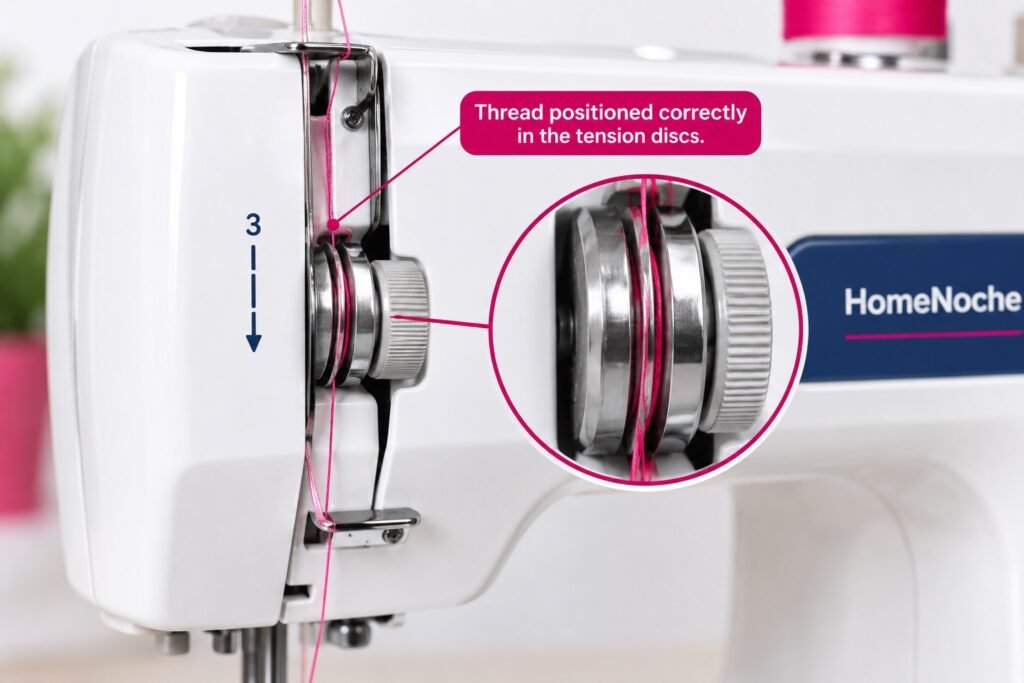
- Hook the thread up and through the take-up lever (the small metal arm with a slot or hole, usually on the front-left of the machine).
- Bring the thread back down through one or two lower guides toward the needle.
- Thread the needle from front to back (on most machines check your manual, some models thread back to front). Leave about 10 cm of thread tail hanging free.
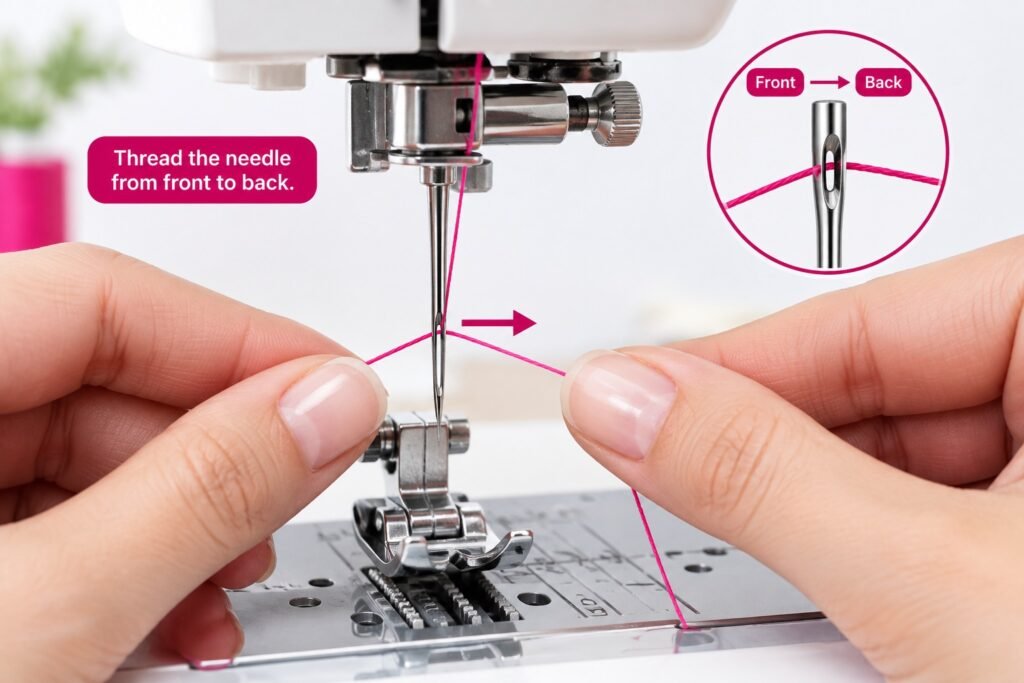
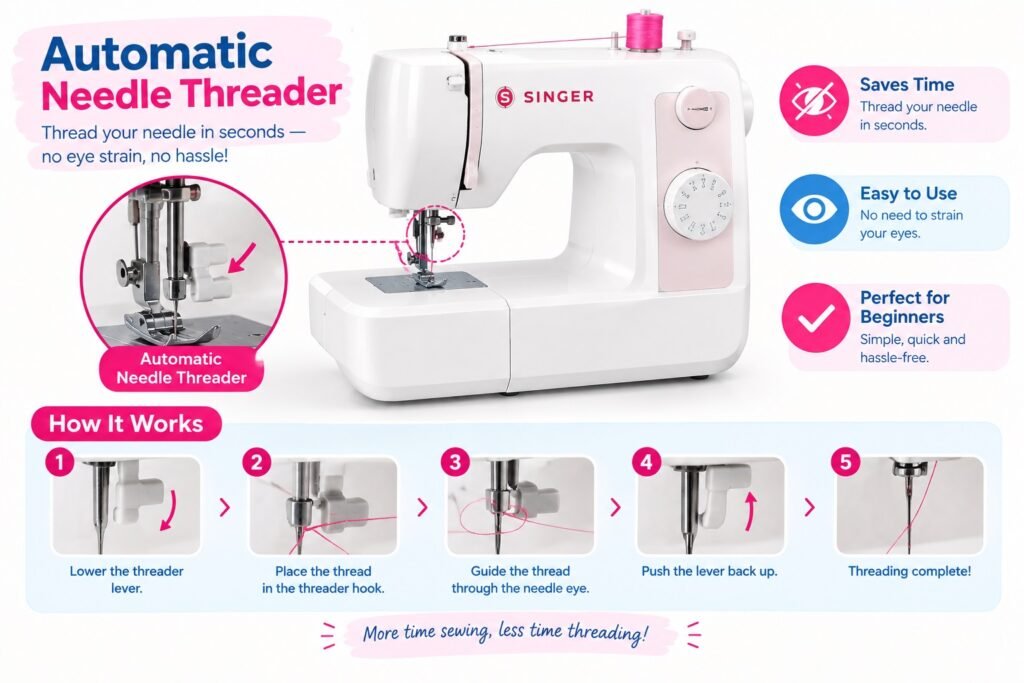
Tip: If your machine has a built-in needle threader (a small lever near the needle), lower it, hook the thread, and let it pull the loop through much easier than threading a small needle eye by hand.
Winding and Inserting the Bobbin
Wind thread onto an empty bobbin using the bobbin winder, then insert the bobbin into its case or compartment so the thread unwinds in the correct direction.
- Wind the bobbin. Place an empty bobbin on the bobbin winder spindle, thread it according to your machine’s winding guide, and run the machine briefly until the bobbin is evenly filled and not overfilled.
- Open the bobbin compartment. This is either under a small sliding plate (front-load machines) or a removable case at the side (top-load machines).
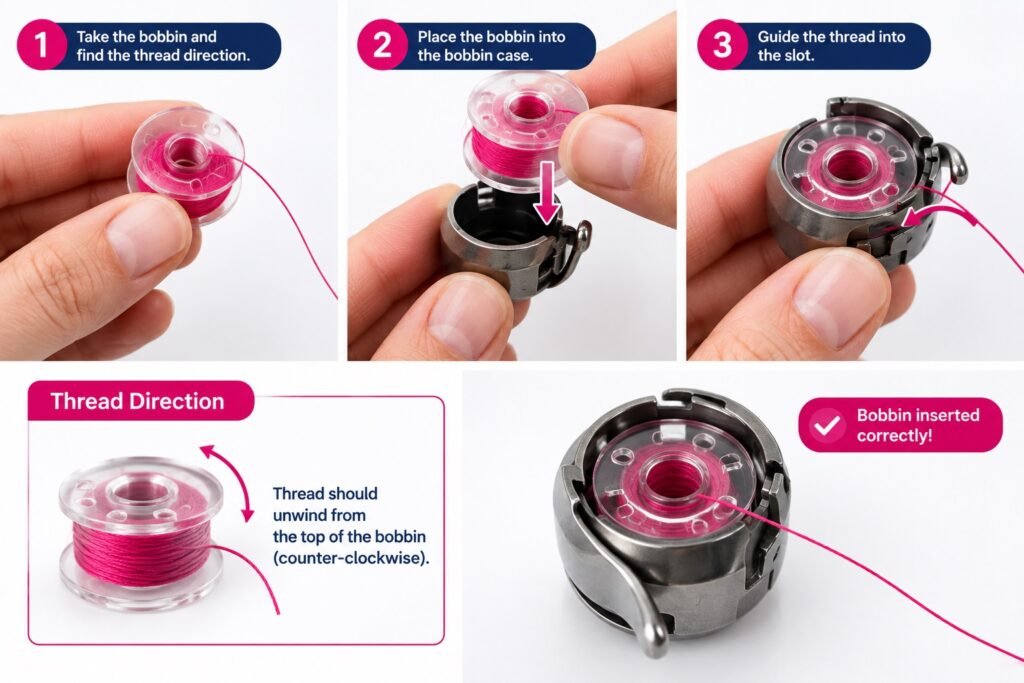
- Insert the bobbin so thread unwinds in the correct direction usually anticlockwise for top-load machines. If it’s inserted backwards, the machine won’t pick up the thread correctly and stitches will fail from the very first attempt.
- Draw the thread through the tension slot on the bobbin case, leaving about 10 cm free, then close the compartment.
Bringing the Bobbin Thread Up
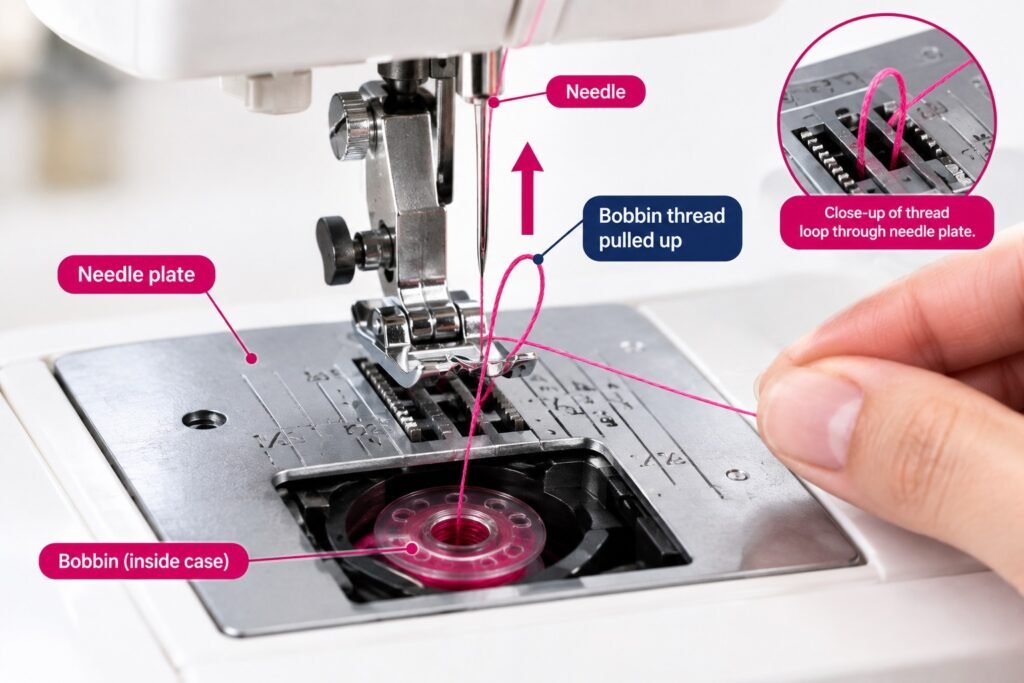
Hold the top thread lightly, turn the handwheel one full rotation, and the bobbin thread will loop up through the needle plate pull both threads back and to the side, under the presser foot.
- Hold the needle thread loosely with one hand.
- Turn the handwheel toward you one complete rotation. The needle will drop and rise, catching the bobbin thread and pulling a loop up through the small hole in the needle plate.
- Use scissors or tweezers to pull that loop fully to the surface.
- Pull both threads together, back and to the side, tucking them under the presser foot so they don’t tangle when you start sewing.
Your machine is now fully threaded. Run a few test stitches on scrap fabric before starting your project if the tension looks uneven, see the troubleshooting section below.
Threading by Brand: Singer, Brother, Janome
The core sequence above applies to almost every home sewing machine sold in Australia, but the exact number of guides and their positions vary slightly by brand.
Brand | Threading notes | Automatic needle threader? |
|---|---|---|
Singer | Typically 4–5 thread guides; tension dial often numbered 0–9 | Common on mid-range and above models |
Brother | Colour-coded threading path printed on the machine body | Standard on most current models |
Janome | Similar colour-coded path; bobbin usually top-load with a clear cover | Common on newer models |
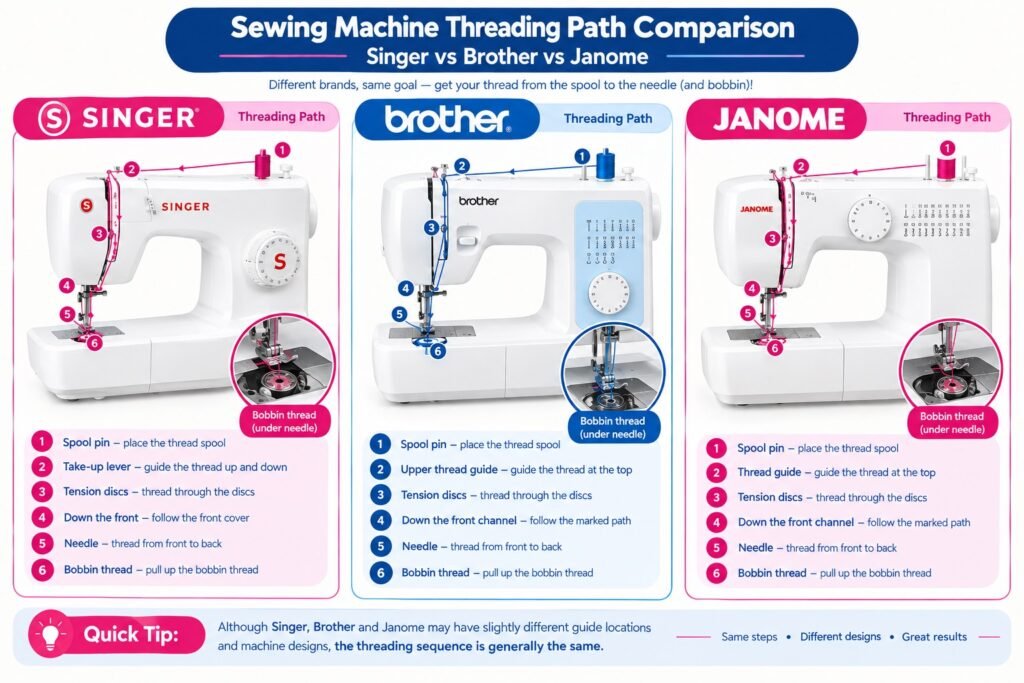
One brand variation worth knowing: on nearly all machines you turn the handwheel toward you (anticlockwise, viewed from the side) to raise the needle but a small number of older or non-standard models run the opposite way.
If turning the handwheel toward you seems to lower the needle instead of raising it, don’t force it turn it the other way and check your manual to confirm which direction is correct for your model.
Matching Thread and Needle to Your Fabric
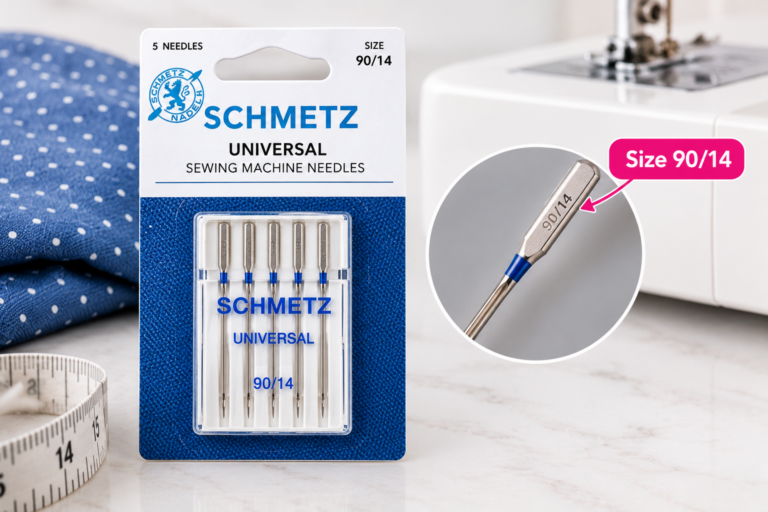
Use a fine needle (size 70/10–80/12) with lightweight fabrics like quilting cotton or voile, and a heavier needle (size 90/14–100/16) with denim, canvas or multiple fabric layers mismatching the two is one of the most common causes of the tension and breakage problems below, even when the machine is threaded correctly.
Threading technique gets most of the attention, but a correctly threaded machine can still misbehave if the needle or thread doesn’t suit the fabric. A needle that’s too fine for a heavy fabric will deflect, skip stitches or snap; a needle that’s too heavy for delicate fabric will leave visible holes and can snag the weave. As a general starting point:
- Lightweight fabrics (voile, chiffon, lightweight quilting cotton): fine needle (70/10), lightweight all-purpose thread
- Medium fabrics (quilting cotton, linen, medium knits): standard needle (80/12), all-purpose thread
- Heavyweight fabrics (denim, canvas, upholstery): heavier needle (90/14–100/16), stronger thread rated for the job
If you’re seeing skipped stitches or breakage and you’ve already rethreaded carefully, check the needle size against your fabric before assuming the machine itself is at fault. Using the wrong needle can cause skipped stitches, thread breakage, and fabric damage, so learn how to choose the right sewing machine needle before troubleshooting your machine.
Common Threading Problems and Fixes
Most threading problems come down to three things the thread missing the tension discs, the bobbin inserted backwards, or the needle threaded in the wrong direction.
Problem | Cause | How to Fix |
|---|---|---|
Thread keeps breaking | Tension too tight, or thread missed the discs | Rethread fully, checking the thread sits between the discs |
Machine skips stitches | Needle inserted wrong way, or blunt/bent needle | Re-insert or replace the needle |
Bobbin thread not picking up | Bobbin inserted backwards, or bobbin case not seated | Remove and reinsert following the direction arrow |
Loopy stitches underneath | Top tension too loose | Rethread and check tension dial setting |
Thread bunching under fabric (“bird’s nesting”) | Machine not fully threaded, or presser foot not down | Rethread from scratch with presser foot up, then lower it before sewing |
If You’re Threading an Old or Second-Hand Machine
If a machine that’s been sitting unused threads correctly but still jams, skips or feels stiff, the cause is often lint buildup or dried-out oil in the bobbin area rather than threading technique a quick clean and, on manual machines, a drop of sewing machine oil usually fixes it.
Machines that have been stored for a while inherited, bought second-hand, or pulled out of the cupboard after years off often threads perfectly fine but still perform poorly, and it’s easy to mistake this for a threading mistake. Before you assume you’ve done something wrong:
- Remove the bobbin case and clear out lint and fluff with a small brush (many machines come with one) around the bobbin area and feed dogs.
- Check for old, dried thread fragments caught in the tension discs; these can prevent new thread sitting properly even when threaded correctly.
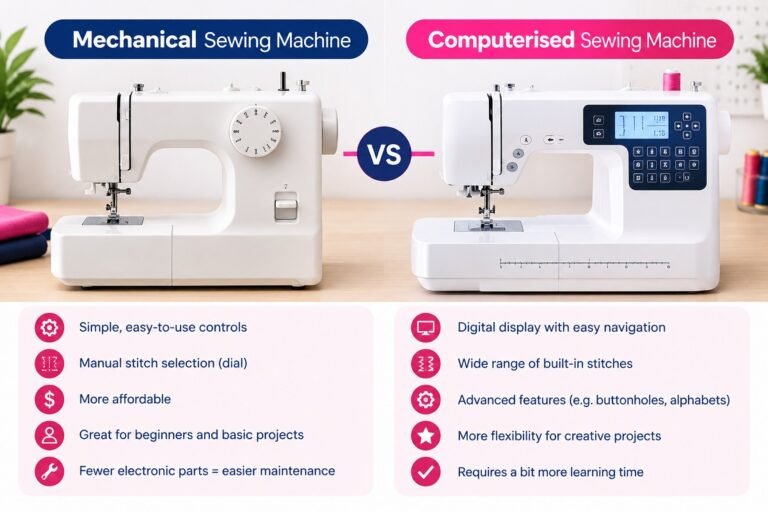
- Oil manual (non-computerised) machines per the manual if it’s been more than a year since last use, computerised machines generally shouldn’t be oiled by hand, so check your model first.
- Replace the needle if you’re not sure how old it is. The needles dull and bend over time even without heavy use.
If the machine still misbehaves after cleaning and rethreading, it may genuinely need a service rather than a DIY fix worth factoring into the decision below on whether to repair or replace.
Choosing Machine and Thread Accessories
If your current machine is difficult to thread, unreliable, or simply past its best, it may be worth upgrading rather than fighting it every session. Likewise, a few well-chosen accessories can make threading noticeably easier.
Who should consider a new machine: beginners whose current machine lacks an automatic needle threader, or anyone whose machine frequently mis-threads or jams despite correct technique.
Who can skip it: if your machine threads correctly and reliably once you follow the steps above, there’s no need to replace it. Most threading frustration is technique, not the machine.
- Entry-level machines with automatic needle threaders worth it for anyone who threads often and finds the needle eye fiddly.
- Self-threading needles / needle threader tools are a low-cost fix if your only issue is the needle eye itself.
- Quality thread reduces breakage and fluff build-up in the tension discs compared with very cheap thread.
- Spare bobbins in the correct class for your machine having pre-wound spares on hand speeds up colour changes.
Key Takeaways
- Threading has two parts: the top (needle) thread and the bottom (bobbin) thread both must be correct.
- Always raise the needle and take-up lever to their highest point before threading the top.
- The thread must sit fully between the tension discs, or stitching will be uneven.
- The bobbin must be inserted so the thread unwinds in the correct direction.
- Most threading faults are technique-based, not a faulty machine rethreading from scratch fixes the majority of problems.
Conclusion
Threading a sewing machine is one of those skills that feels awkward the first few times and then becomes automatic. Get the sequence right top thread through the guides and tension discs to the needle, bobbin inserted the correct way, thread drawn up together and most of the common jams and skipped stitches simply won’t happen.
If your machine is still giving you trouble after rethreading carefully, our Sewing Machine Troubleshooting Guide walks through the more stubborn issues step by step.
Frequently Asked Questions
About Author

Muhammad Irfan Malhi is Content Researcher at HomeNoche. He researches and writes buying guides for home, kitchen and craft products, drawing on manufacturer specifications, retailer data, and Australian consumer sources to help readers make informed decisions. This guide is based on independent research rather than in-house product testing.