
The Complete Guide to Buying a Sewing Machine in Australia (2026)
If you’ve typed “best sewing machine” into Google, chances are you’re standing at one of a few starting points. Maybe you’re a total beginner who wants to learn to sew but has no idea where to start. If that’s you, our how to use a sewing machine for beginners guide walks you through the basics before you even think about buying. Maybe you inherited a machine from your mum or nan and you’re wondering whether to keep it or replace it. Maybe you’re a first-time homeowner tackling curtains and cushion covers, or a parent about to sew a school costume for the third year running. Or maybe you’ve been sewing for a while and you’re finally ready to upgrade.
Whatever brought you here, this guide is built around one goal helping you understand exactly what you need, not what a sales assistant on commission thinks you need.
This guide draws on in-depth research into what’s actually available and priced fairly for Australian shoppers in 2026 covering sewing machines for everything from garments and quilts to home decor and repairs, across both mechanical and computerised models. I won’t recommend specific models here, that’s what our dedicated buying guides are for (linked throughout) but by the end of this article, you’ll know precisely what to look for when you get there.
Affiliate Disclosure: This post contains affiliate links. If you buy through them, HomeNoche may earn a small commission at no extra cost to you. Full details on our Affiliate Disclosure page.
How to Choose a Sewing Machine
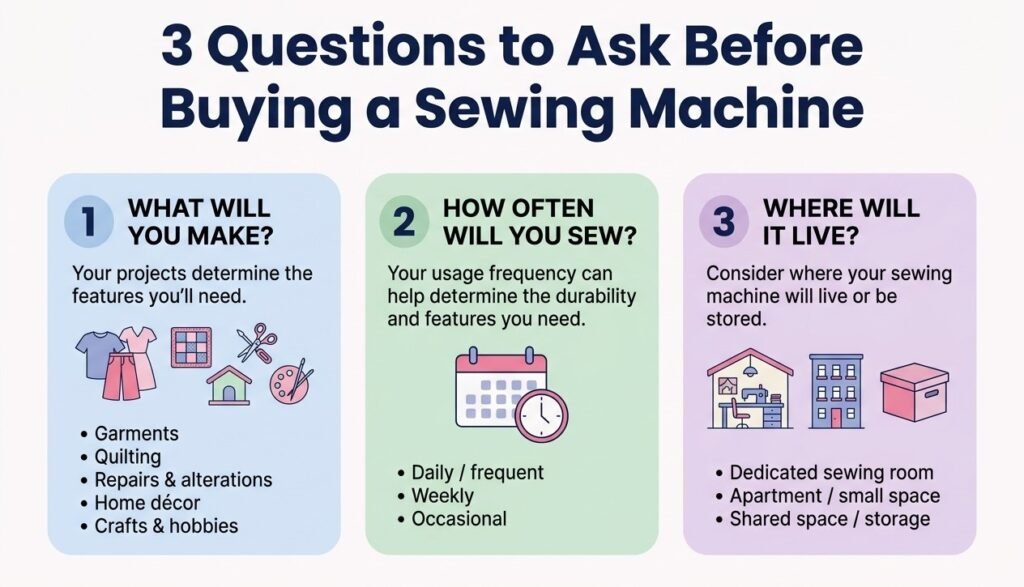
Before you look at a single model, answer three questions honestly:
What will you actually make? Garment sewing, quilting, mending, home décor, and craft projects all put different demands on a machine. Quilters need generous throat space (the area to the right of the needle) to manoeuvre large fabric. Garment sewers benefit from a wide range of stitch types and buttonhole styles. If you’re mostly mending and doing small projects, you genuinely don’t need a machine bristling with 200 stitch patterns.
How often will you use it? A machine that sits in a cupboard for eleven months of the year has different requirements to one that’s out on the table every week. Frequent use justifies spending more on durability and ease of use; occasional use means you can prioritise simplicity and low maintenance.
Where will it live? If you’re sewing in a small apartment or need to pack it away after every session, portability and weight matter far more than they would for someone with a dedicated sewing room.
Once you’ve got honest answers to those three questions, everything else in this guide will make a lot more sense.
Types of Sewing Machines Explained
Australian retailers generally group domestic sewing machines into three categories, plus two specialist types worth knowing about.
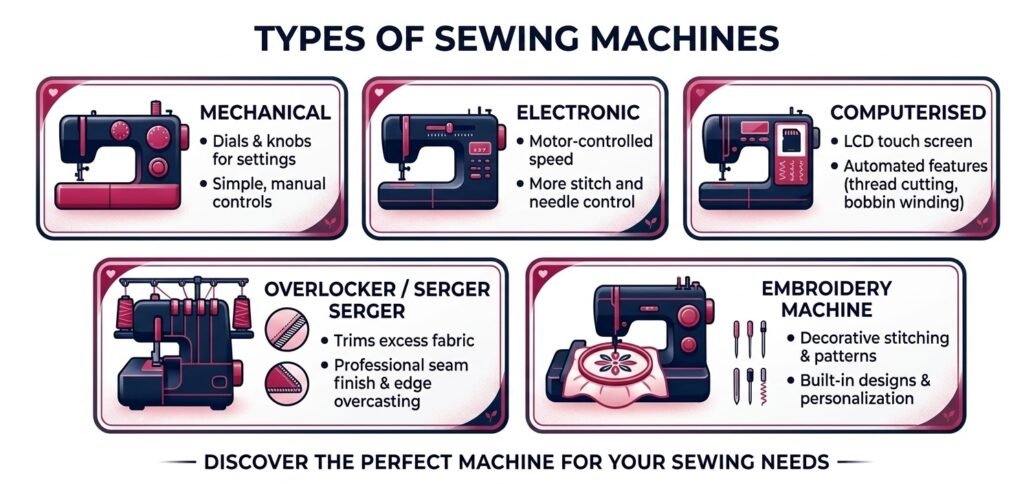
Mechanical (manual) sewing machines use dials and levers to control stitch length, width, and pattern. There’s no screen, no automation, just straightforward mechanical control. They’re generally the most affordable, the easiest to repair, and forgiving for beginners who want to learn the fundamentals of tension and stitch control without a learning curve on menus and settings.
Electronic sewing machines sit in the middle. They’re still largely manually controlled but use a motor with more consistent speed control via a foot pedal, and often offer a slightly wider stitch selection than basic mechanical models, sometimes with simple LCD stitch indicators.
Computerised sewing machines use onboard computers and LCD screens to control stitch selection, length, width, and often tension automatically. They typically include features like automatic needle threading, drop-in bobbins, and dozens (sometimes hundreds) of built-in stitches. They’re more expensive and have more components that can need servicing, but they remove a lot of the guesswork for people who want convenience.
Overlockers/sergers are a different category altogether they trim, stitch, and finish seam edges in one pass, giving garments a professional, shop-bought finish. They’re not a replacement for a regular sewing machine; most serious garment sewers eventually own both.
Embroidery machines are built specifically for decorative stitching and monogramming, often using digital designs loaded via USB. If your interest is purely decorative work rather than construction sewing, this is a separate purchase to consider down the track, not a starting point.
Mechanical vs Electronic vs Computerised: Quick Comparison
Feature | Mechanical | Electronic | Computerised |
|---|---|---|---|
Typical price range (AUD) | $100–$350 | $250–$500 | $400–$2,000+ |
Ease of use for beginners | Simple, tactile | Moderate | Very easy (guided) |
Stitch variety | Basic (10–20) | Moderate (20–50) | Extensive (50–200+) |
Automatic needle threader | Rarely | Sometimes | Usually |
Repair complexity | Low | Moderate | Higher |
Best suited to | Learning fundamentals, occasional mending | Everyday home sewing | Frequent sewing, varied projects, garment/quilting detail work |
Key Features to Consider
Ignore the marketing copy about “200 built-in stitches” for a moment. Here’s what actually affects your day-to-day experience.
Stitch variety vs stitch usefulness. Most home sewers regularly use around 8–10 stitches: straight stitch, zigzag, a few stretch stitches, and one or two decorative options. A high stitch count looks impressive on a box but rarely reflects how the machine will actually be used.
Buttonhole function. A one-step buttonhole (where the machine measures and sews the whole buttonhole automatically) saves enormous frustration compared to a four-step manual version, especially if you’re making garments regularly.
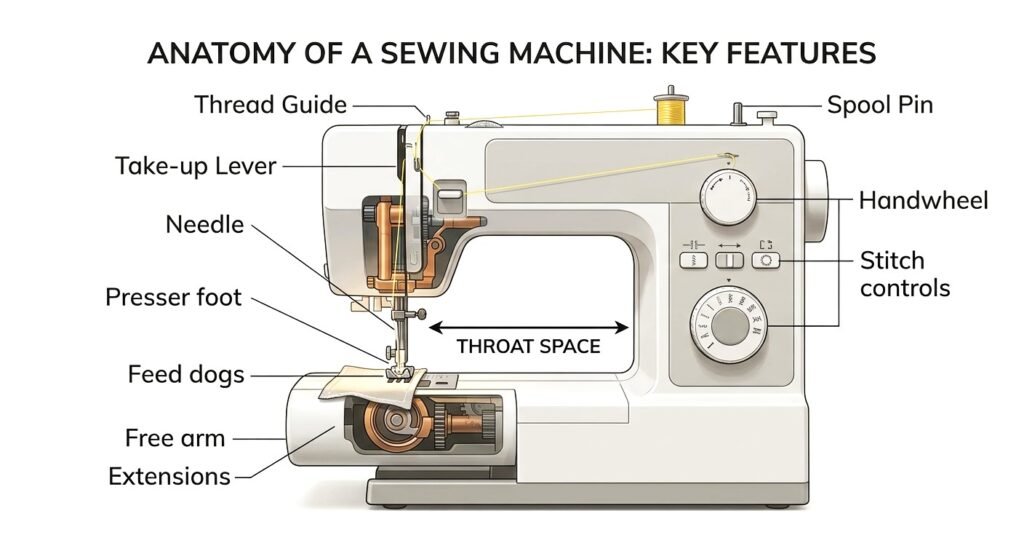
Throat space. Measured from the needle to the machine’s body, this determines how much fabric you can comfortably manoeuvre. It matters most for quilting and larger projects; less so for garment repairs and small crafts.
Feed dog and presser foot pressure control. These affect how evenly different fabric types move through the machine. Machines with adjustable presser foot pressure handle a wider range of fabrics from delicate chiffon to heavier denim more reliably.
Free arm capability. A removable section that exposes a narrow “arm,” making it far easier to sew cuffs, sleeves, and trouser hems. Genuinely useful for garment sewing.
Automatic needle threader. A small feature that saves real frustration, particularly for anyone with eyesight difficulties or limited patience for threading fiddly needles.
Noise and vibration. Often overlooked until you’re sewing late at night after the kids are in bed. If quiet operation matters to you, this is worth checking in-store rather than relying purely on spec sheets.
Speed control. Adjustable maximum speed settings are helpful for beginners who want to start slow and build confidence, and for detail work that needs precision over speed.
Portability and weight. If your machine needs to be stored away or moved between rooms, weight and included carry cases matter more than they might seem to on paper.
Beginner vs Advanced Needs
If you’re learning to sew, prioritise simplicity over stitch count. A solid mechanical or basic electronic machine with a small, well-chosen stitch selection, adjustable speed control, and reliable tension will teach you the fundamentals without overwhelming you with menus. Once you’ve chosen your machine, our step-by-step beginner’s guide to using a sewing machine will help you get started with confidence. Many experienced sewists myself included believe starting on a simpler machine builds a better intuitive understanding of tension, feed, and fabric handling than jumping straight to a fully automated model.
If you’re returning to sewing after a break, consider what’s changed since you last used a machine. Computerised features like automatic threading and one-step buttonholes have become far more common and affordable, and might solve frustrations you remember from years ago.
If you’re an intermediate or advanced sewer, the priority shifts toward machine capability matching your specific projects: extended throat space for quilting, a wider range of stretch stitches for activewear, or heavier-duty motors for thicker fabrics like denim and canvas. At this stage, it’s also worth thinking about whether you need a dedicated overlocker alongside your sewing machine, rather than expecting one machine to do everything.
Budget Considerations in Australia
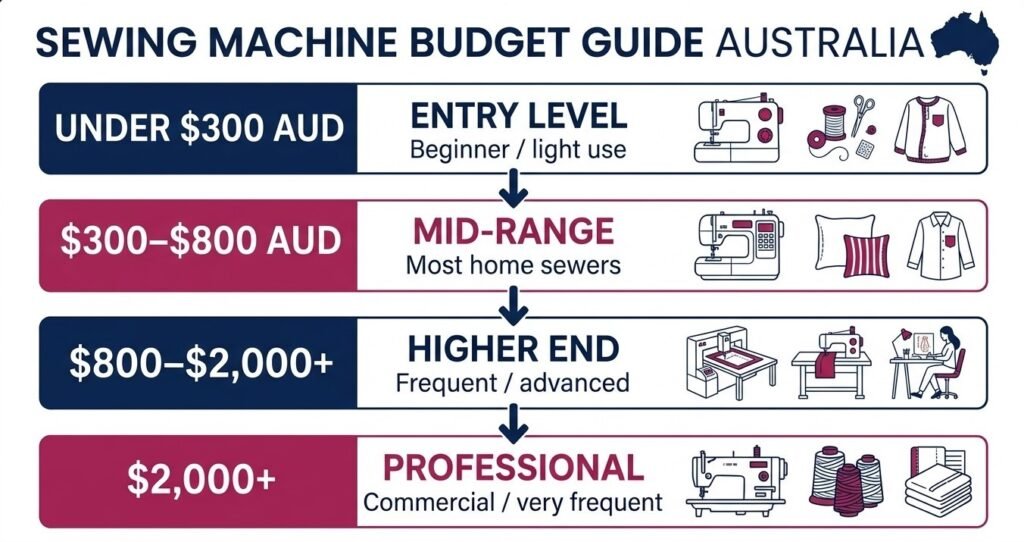
Sewing machine pricing in Australia roughly breaks down as follows:
- Entry-level (under $300 AUD): Basic mechanical and simple electronic machines. Fine for learning fundamentals and light, occasional use.
- Mid-range ($300–$800 AUD): A broad and genuinely useful category this is where many computerised machines with practical automation (needle threading, one-step buttonholes, moderate stitch variety) sit. Most home sewers, from committed beginners to intermediate users, find their long-term machine here.
- Higher-end ($800–$2,000+ AUD): Machines aimed at quilters, frequent garment makers, and small-scale sewing businesses, with larger throat space, more robust motors, and extended stitch libraries.
- Professional/semi-industrial ($2,000+ AUD): Built for heavy, frequent use generally unnecessary unless you’re sewing commercially or extremely frequently.
A genuinely important budget consideration Australians often overlook: factor in servicing costs. Most machines need a service roughly once a year with regular use, and Australian servicing typically costs somewhere in the order of $80–$150 depending on your region and the machine’s complexity. A cheaper machine that’s difficult or expensive to get serviced locally can end up costing more over time than a slightly pricier one with accessible local support.
Also budget for basics you’ll need from day one: extra bobbins, a seam ripper, fabric scissors, pins, and a walking foot if you plan to work with knits or quilting layers. These typically add $30–$80 AUD to your initial spend.
Common Mistakes When Buying a Sewing Machine
Buying based on stitch count alone. As covered above, most people use a small fraction of the stitches on offer. Don’t pay extra for capability you won’t touch.
Ignoring after-sales support and servicing availability. A machine with no accessible local servicing or spare parts in Australia can become a genuine headache down the track, regardless of how good the initial price looks.
Overbuying for your current skill level. A highly automated machine bought before you understand sewing fundamentals can actually slow your learning you skip developing an intuitive feel for tension and stitch control that a simpler machine teaches naturally.
Underestimating weight and portability needs. If you’ll be moving your machine regularly to classes, between rooms, or into storage a heavy machine you didn’t test-lift can become a genuine deterrent to using it.
Not testing before buying, where possible. Specs on a page don’t tell you how a machine feels to operate, how loud it is, or how intuitive the controls are. Where you can, try before you buy many specialty sewing retailers across Australia allow this.
Forgetting warranty terms. Warranty length and what it actually covers (parts vs labour, in-home vs return-to-store) varies significantly between brands and retailers. Read the fine print rather than assuming.
Choosing based on price alone, at either end. The cheapest machine can mean unreliable tension and short lifespan; the most expensive doesn’t automatically mean “best for you” if it’s loaded with features you’ll never use.
Accessories and Extras That Actually Matter
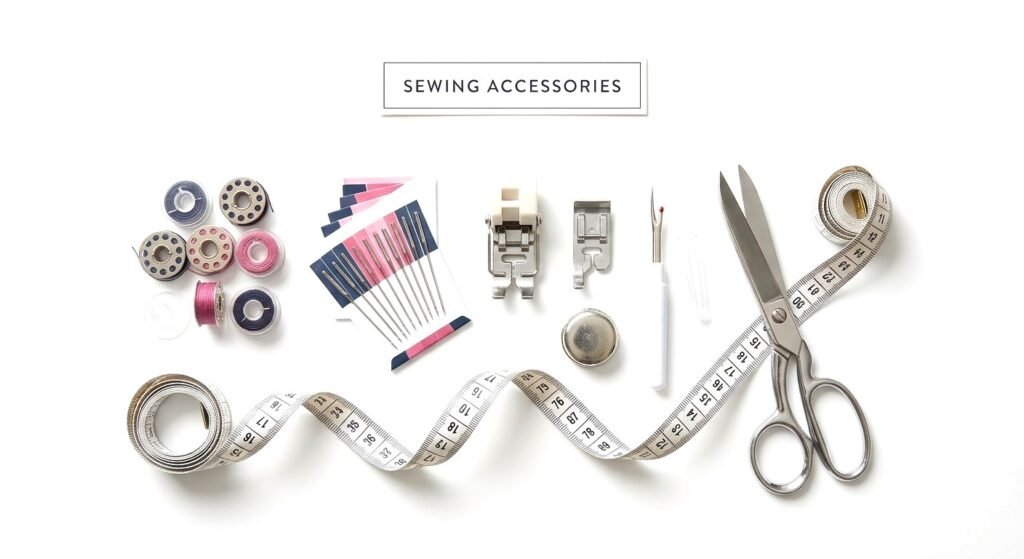
Not every bundled accessory is worth paying extra for, but a few genuinely earn their place in your kit:
- Extra bobbins you’ll go through these faster than you expect.
- A walking foot makes an enormous difference sewing knits, quilting layers, and slippery fabrics.
- A zipper foot is essential the moment you attempt a garment with a zip.
- Spare needles in different sizes and fabrics need different needle weights; using the wrong one is a common source of skipped stitches and fabric damage.
- A hard or padded carry case protects the machine if it’s moved or stored, and matters more than it sounds if you’re short on space.
- A dust cover is a small thing that meaningfully extends a machine’s working life, especially in dustier or humid Australian climates.
Skip paying extra for elaborate decorative stitch libraries, branded storage furniture, or bundled fabric kits unless you specifically know you’ll use them; they’re common upsell inclusions that inflate the price without adding real day-to-day value for most buyers.
About Author

Content Researcher at HomeNoche. We researches and writes buying guides for home, kitchen and craft products, drawing on manufacturer specifications, retailer data, and Australian consumer sources to help readers make informed decisions. This guide is based on independent research rather than in-house product testing.